My new house didn't have a shed, but just a carport with no fourth wall (it was brilliant in every other respect, really—even insulated in the ceiling). So, as part of the WMF's "Spark Project" (that aims to encourage employees to do more than just be wiki geeks), I decided to turn the carport into a shed by adding a set of wooden ledge-and-brace doors. There was a deadline of April 18 (i.e. tomorrow).
This post documents the process up to the point of being ready to hang the doors. Unfortunately, the hinges aren't back from the galvanizer's yet (or haven't even been welded? Zoran the welder wasn't communicating with me over the Easter break) so the project is incomplete; I'll post more when the doors are up.
All of these photos and a few more are in a Flickr album.
Design
How wide is not wide enough, or what is the absolute minimum garage door size that will still fit a (small) car? I settled on 2.2 m, and subsequent testing has confirmed that this is fine for most cars—not that cars will be allowed in this shed, mind.

Some changes were made as construction progressed: the double studs either side of the door were turned 90° in order that the hinge bolts be able to add some extra joining strength between them; the sizing of all timber was adjusted to match what was available. Mostly things turned out as planned though.
Timber
[] flic.kr/p/S2A6dY
https://www.flickr.com/photos/freosam/32835806276/in/album-72157676679531874/
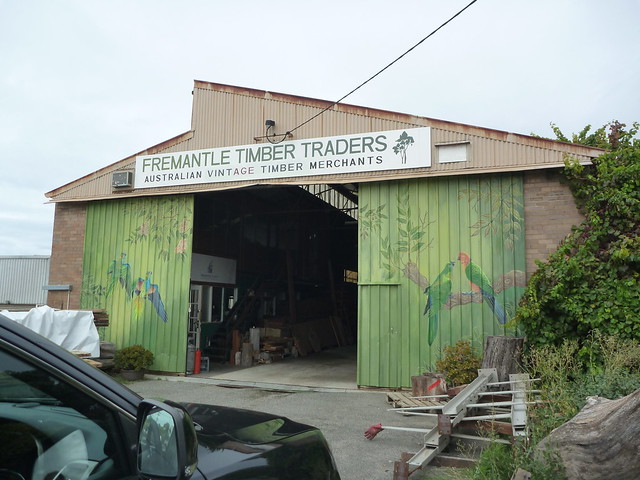
I wasn't sure what to build the doors with, but heading to <a href="http://fremantletimber.com.au/">Freo Timber Traders</a> (above) and finding a couple of packs of nice old <a href="https://en.wikipedia.org/wiki/Eucalyptus_wandoo">Wandoo</a> settled it.
https://www.flickr.com/photos/freosam/32033942784/in/album-72157676679531874/
The 60x19 for the cladding came from a house in Wembley; the 110x28 for the ledges and braces came from an old shoe factory in Maylands. The ex-factory floor was covered in machine oil, and full of holes from where the machines had been bolted down. None were in any awkward spots though, and as I was planning on oiling the finished product I wasn't too worried about the oil.
Doors
The first thing to do was to prepare the timber for the ledges and braces by removing the tongues and grooves with a draw-knife and plane (shown below). I wasn't too worried about making these edges pristine or accurate; these are shed doors not furniture and I rather like the rough, used, look. It was also stinking hot while I was hacking away at these, and there's something viscerally satisfying about draw-knives, sweat, and following the grain of the timber (and what shitty grain some of it was! But some, smooth as silk).
https://www.flickr.com/photos/freosam/32723485842/in/album-72157676679531874/
The main joinery of the doors is the mortise-and-tenon joints at each end of the four 45° braces. These are what take the main load of the cladding hanging on the outside. (It's worth noting here how common it is for this style of door to have their braces put on the wrong way around — the idea is that the brace is in compression and for it to go up from where the hinge attaches; if it's running from the hinge point downwards then it's pretty much doing nothing, and the door will sag.)
Cutting the tenon cheeks:
https://www.flickr.com/photos/freosam/32835982596/in/album-72157676679531874/
Some tenons, with the ledges behind:
https://www.flickr.com/photos/freosam/32876859535/in/album-72157676679531874/
The mortises were easier than the tenons in some way, although they took longer. Mortises, cut by hand as I was doing, are basically an exercise in holding a chisel vertical and square, thumping it with a fair bit of strength, and moving it 2 mm before repeating.
One end of each mortise is cut at 45° where the brace comes in; the other is square and is where the main force of the door is held.
https://www.flickr.com/photos/freosam/32740587400/in/album-72157676679531874/ https://www.flickr.com/photos/freosam/32903749561/in/album-72157676679531874/ https://www.flickr.com/photos/freosam/32988540556/in/album-72157676679531874/
Once the ledges and braces were done, the cladding was screwed on from the back with 40 mm stainless steel decking screws.
https://www.flickr.com/photos/freosam/33219344666/in/album-72157676679531874/
The boards were spaced with 2 mm gaps to account for timber movement, to prevent the doors from warping. The ends were docked square and to size once all the boards were on.
https://www.flickr.com/photos/freosam/32598628933/in/album-72157676679531874/
The finished doors:
https://www.flickr.com/photos/freosam/32570143514/in/album-72157676679531874/
Walls
The two side walls are 2.1 m high and about 400 mm wide. They're painted treated-pine stud frames clad with more 19x60 Wandoo flooring.
They're fixed to the slab below:
https://www.flickr.com/photos/freosam/32817410853/in/album-72157676679531874/
And screwed to the beam above:
https://www.flickr.com/photos/freosam/33590228736/in/album-72157676679531874/
(The threaded rod in the background of the above is a tie to hold the top beam in its place when the force of the open doors is tending to pull it outwards.)
The cladding was put on with the same spacing as the doors:
https://www.flickr.com/photos/freosam/32711474583/in/album-72157676679531874/
And when completed, had the place looking a fair bit closer to enclosed:
https://www.flickr.com/photos/freosam/33485225416/in/album-72157676679531874/
Incomplete
Unfortunately, this is where it stops for now, because I'm having some hinges fabricated and they're not yet done. As soon as they are, and the thirty bolts are doing their thing, I'll post some photos of the finished project.
(By the way, I am surprisingly grateful to the Spark Project initiative for making me get off my bum and actually get to work on these doors.)
2019-04-21: more Osmo.
Gate lock
The lock pieces were painted.
Costs
| Date | Qty | Desc | Total |
|---|---|---|---|
| 2017-03-06 | 1 | 3.5 mm HSS drill bit | 3.75 |
| " | 14 | M10 x 85mm bugle head screws | 19.00 |
| " | 30 | M12 x 75mm screws | 12.60 |
| " | 4 | 10M x 100mm stainless dynabolts | 25.52 |
| " | 4 @ 3.6 m | 90 x 45mm H3 treated pine | 76.04 |
| " | 2 @ 2.4 m | 90 x 35mm H3 treated pine | 17.52 |
| 2017-03-18 | 8.2 m | 60 x 19mm Wandoo T&G flooring | 50.00 |
| 2017-03-19 | 1 l | Paint, ext. Weathershield, Surf mist | 42.90 |
| " | 1 | Grey brick & concrete silicone | 10.56 |
| 2017-04-28 | 25 | M10 x 60mm cup head bolts and nuts | 18.15 |
| " | 12 | M10 x 120mm cup head bolts and nuts | 18.72 |
| " | 6 | M10 x 130mm cup head bolts and nuts | 11.70 |
| 2017-04-30 | 1 | Hasp & staple | 15.50 |
| " | 50 | 8g x 40mm SS decking screws | 14.00 |
| " | 1 | Top padbolt | 17.47 |
| " | 2 | Gate drop-bolts | 36.98 |
| " | 40 | M10 galv. washers | 9.60 |
| Total: |
